Flyer Released!

After an initial “soft launch” this past week, I’m happy to report the Flyer internet modem is now available for general sale!

For anyone definitely planning to purchase one, please note that I’m producing the Flyer in small batches initially. The first draft of the manual is available on the product page so you can get a good overview of what is currently possible with the Flyer. And as mentioned in previous posts, the Flyer firmware can be easily and safely upgraded over the internet, and many more features are planned for future updates.

You can also stop by the “official” companion site for the Flyer, commodoreONLINE, which provides cloud storage services for the Flyer. It’s 100% free, and will provide a few features you might even want to use even if you don’t have a Flyer, such as the D64/D71/D81 disk editor that just came online this past weekend.

As promised, the “cloud SDK” will be posted shortly, as soon as I write up a bit of documentation. This is simply a PHP class that will help you decode/encode the data packets exchanged with the Flyer, as well as providing a few additional utility functions. This will allow anyone to add support for the Flyer to their own websites. If you have a Flyer and want to experiment with this now, just contact me.

Thanks for reading. As usual, any and all feedback is welcomed!

No News Is Good News

In this case at least.

Apologies for the lack of updates, especially after telling quite a few folks that “I’ll post some new info shortly” for the past couple of months :/

Here’s the latest on the Flyer project:

  • I’m finishing up a comprehensive user guide which should be wrapped up by the end of the weekend.
  • The hardware has been final for quite some time. A number of units are built, tested and ready to go.
  • I was able to get the cost down to $100 by re-sourcing some components and purchasing a few items in bulk.
  • A companion website for online disk and program storage is in place and will be announced shortly.

I feel confident in saying that the Flyer will be available very soon for anyone interested in purchasing one. I don’t want to release anything half-baked or missing any obvious functionality, even though firmware updates are extremely easy and safe to perform on the Flyer (and I have many ideas planned for future updates).

First impressions and all that…

Anyway, since this is a short update I’ll reprint one of the examples from the user guide on writing a very simple network-based “fortune cookie” program with the Flyer.  Keep in mind this will work on nearly any Commodore machine.

Thanks for reading!

4.1 Writing a Fortune Cookie Program

This example will demonstrate how easy it is to write a simple internet-enabled program in BASIC using the Flyer. Our goal is to write a program to fetch one of potentially thousands of “fortune cookie” messages from an HTTP server and display them to the user.

The Server

The first thing we’ll do is write a PHP script to serve messages back to the client. To keep things simple, we’ll just choose one of three hard coded messages (a “real” solution would most likely parse/fetch data from real fortune files or a database, but that’s outside the scope of this example).

<?php

require_once 'Retroswitch.inc.php';

$fortunes = array(
"As a computer, I find your faith in technology amusing!",
"If a pig loses its voice, is it disgruntled?",
"Confidence: The feeling you have before you understand the situation."
);

$index = rand( 0, count( $fortunes ) - 1 );
$petscii = Retroswitch::AsciiToPetscii( $fortunes[$index] );
e c h o urlencode( $petscii );

?>

This script has been placed at www.retroswitch.com/scripts/fortune.php.

A couple of things are worth pointing out…

First, since Commodore computers do not use standard ASCII (although it’s very close), we must convert any text data before outputting it to ensure it will be displayed properly (this will always be an issue when communicating with “the outside world” from your Commodore). The Retroswitch utility class (available on retroswitch.com) contains PHP code for converting between ASCII and PETSCII.

Second, note that we are url encoding the returned fortunes, since we’ll be reading them with the INPUT# instruction. INPUT# will stop on various delimiters (such as a comma), and url encoding allows us to retrieve the entire response in one chunk. Otherwise we would have to use GET#  and receive one character at a time, which is much slower. Of course, url decoding in BASIC is also quite slow and is the main cause for the delay when retrieving fortunes in this example. It is a perfect candidate for a speedy little machine language routine, however!

The Client

Next we’ll write a BASIC program that will fetch and display a random message. This program should be entered and run in lower case mode, as with all the other examples in this manual.

This first section is the main loop of the program. It simply fetches and displays a fortune, then prompts the user whether they would like to continue:

10 gosub 100: rem returns random fortune in m$
20 print:print m$:print
30 print"Would you like another (Y/N)?"
40 get q$: if q$="" then goto 40
50 if q$="y" OR q$="Y" then goto 10
60 print:print"Have a nice day!"
70 end

Next is the subroutine which performs the HTTP request to retrieve the fortune. We first open the command channel so we can check error status and issue commands. Then we open a general communications channel (2 in this example), using the HTTP protocol and supplying the path to our PHP script.

We can add additional POST and FILE data to the HTTP request at this point since the server transaction has not yet occurred. However, for this example we’re only interested in the server response so we initiate the transaction immediately by issuing the HTTP-TRANSACT command over the command channel, specifying the communication channel with the pending transaction (#2). This pattern should be very familiar to anyone that has done direct-access disk programming.

Once the transaction has occurred, the server’s response can now be read. We read the response into E$, url decode it, then return the result back to the main loop in M$:

100 open 7,7,15: rem open command channel
110 open 2,7,2,"http:retroswitch.com/scripts/fortune.php"
120 print#7,"http-transact:2":gosub 500
130 input#2,e$:gosub 500
140 close2:close7
150 gosub 200: rem url decode e$, result in u$
160 m$ = u$
170 return

Next we have a couple of subroutines used for url decoding:

200 rem url decode from e$ to u$
210 sl=len(e$):u$="":ifsl=0thenreturn
220 fori=1tosl:ac=asc(mid$(e$,i,1))
230 ifac=43thenu$=u$+" ":goto280
240 ifac<>37thenu$=u$+chr$(ac):goto280
250 an=asc(mid$(e$,i+1,1)):gosub300:h0=dn
260 an=asc(mid$(e$,i+2,1)):gosub300:h1=dn
270 i=i+2:u$=u$+chr$(h0*16+h1)
280 nexti
290 return

300 rem convert ascii nybble to dec from an to dn
310 ifan>=48andan<=57thendn=an-48:return
320 ifan>=65andan<=90thendn=an-55:return
330 ifan>=97andan<=122thendn=an-87:return
340 dn=0:return

And finally a short subroutine which we call periodically during the network I/O to check for any error conditions. If an error is detected, we print the error code and message before quitting.

500 input#7,a,b$,c,d
510 if a=0 then return
520 close2:close7
530 print"Error: ";a
540 print"Message: ";b$
550 end

That’s it! For your typing convenience, this sample program can be loaded directly from the following location:

load”http:retroswitch.com/programs/fortune.prg”,7

Are We There Yet?

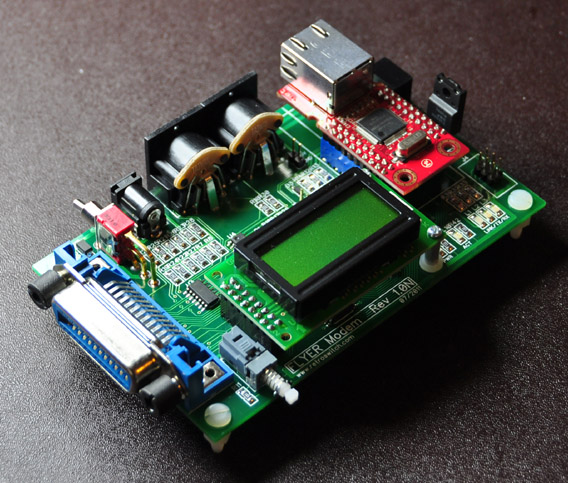
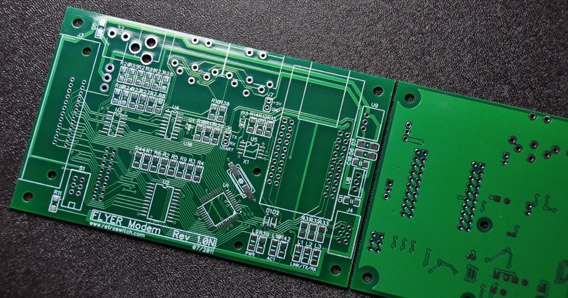
The final board layout will be sent out for manufacture this weekend. I’m sticking with the right angle IEEE-488 connector for the time being since I have quite a few that need to be used. It’s only a minor inconvenience if using short or very heavy IEEE-488 cables.

Firmware should be “production ready” a week or so after I receive the final PCBs, so anyone interested in one of the first units should contact me via the form on this site and I will let you know exact dates as I get them. I will also try to source some of the pricier components from other suppliers in an effort to lower the final cost of the units as much as possible.

The rest of this entry will focus on a few random examples of the Flyer in action. All but the last one were taken while hooked up to my CBM 8032.

This is NOT a comprehensive overview of the device’s feature set. Also note that the firmware is easily upgradeable over the internet and many exciting features are planned for future releases. I enjoy getting feature requests as well!


This is the network setup page of the bundled CONFIG program. It’s not fancy, but that’s because it was intended to work across a wide variety of Commodore machines 🙂

I should clarify that *no* software needs to be loaded on the host machine in order to use the device in any way. This is one page of the configuration program that is bundled with the Flyer. The bundled software is stored in the firmware itself and is therefore updated with each firmware update. It is exposed via a read-only secondary virtual drive unit which doesn’t support the full feature set of the main virtual drive. In fact, it really only supports returning directory contents (e.g. load”$1:c*”,10) and loading programs (e.g. load”1:config”,10).

The CONFIG program itself is a very simple BASIC program that retrieves and updates settings on the Flyer via simple IO commands, which can also be done manually if desired (open7,7,15,”config:ip=192… etc).

You may notice there is no mention of DHCP, as it’s not currently supported. However, I hope to have an implementation working before initial release.


Here is an example of adding a new disk to the local store/cache on the Flyer. Higher level device management is performed via the control peripheral at address #7. The virtual drive can be assigned address 8 through 15. In these examples, my virtual drive is assigned address 10.

First a new D71 disk is added via the disk-add command. The “MyStuff” label is used to identify the disk on the LCD display and when transferring the disk to/from “the cloud”. Think of it as the label sticker on the outside of a real diskette.

After the disk is added, it still must be formatted (as demonstrated by the failed directory load). This is done using the virtual drive using standard syntax.


This is just a very simple BASIC program which fetches some information from the control device about disks stored on the Flyer.


Now for some of the cooler features! Here we’re loading a program from teh internets directly into the machine, just as if it was your own personal disk drive 🙂

Loading a disk image into the onboard cache requires only one additional argument. For example:

load"http:somesite.com/programs/neatstuff.d64,D=Games1",7

This will attempt to reserve space on the Flyer and download neatstuff.d64 into the onboard flash store. Simple checks will verify it matches the known sizes of D64, D71 or D81 images. “Games1” is the label assigned to the new disk.

What happens if we try to load neatstuff.d64 into BASIC memory (we omit the ,D)? I won’t bore anyone here with the specific firmware details, but this would fail before reaching the host machine and the Flyer would merely show an error condition.

“That’s great, but that’s an awful lot of typing” some of you might be thinking. Not shown here are aliases which can be configured and used in place of protocols (or anything else for that matter). For example, A0: might be aliased to HTTP:RETROSWITCH.COM/PROGRAMS/. At that point, we merely have to type load”A0:someprogram.prg”,7. Winning!


In this example, I just wrote a simple PHP script on my local test server which provides a sort of dropbox functionalty to allow me to load AND save programs and disk images to the cloud.

The exposed HTTP protocol allows a decent amount of flexibility when used with the generic data channels (2-14), such as adding POST variables, file data, etc. They are bidirectional based on when the HTTP transaction has occured. In other words, an HTTP channel will be write only until the HTTP transaction has been kicked off via the control device’s command channel. Then the data channel will be read only, and the results from the server can be read back (GET#, etc).

When used with channels 0 or 1, some of this is done automatically in order to work conveniently with LOAD and SAVE.

Is HTTP all that is/will supported? Absolutely not! The exposed TCP protocol is being wrapped up now, and future plans include supporting higher level protocols such as FTP.

In addition to this, a new hybrid protocol is currently in the works to make it very easy to browse and share disk and program collections across multiple sites which support this abstraction. Yes, that’s kinda vague, but I think it’s gonna be pretty cool, and it will give me something to write about in an upcoming blog post 🙂

It Lives!

I’m happy to report the prototypes work beautifully!

The first two prototypes were assembled a couple of days ago, but I decided to hold off posting photos until my backordered IEEE-488 connectors arrived (this morning – finally!).

A few minor tweaks will be made before ordering production boards (with red solder mask), including the addition of a trim pot for adjusting the display contrast and possibly switching to a vertically mounted IEEE-488 connector to keep a slimmer profile (and allowing the standard IEEE-488 cabling to run towards the back of the device instead of to the front – see next photo).

Relaxen und watchen das blinkenlights…

The bulk of my time will now be spent wrapping up the initial release firmware (can be updated via the internet), getting documentation put together, writing sample applications, etc. As promised, I will include some detailed information about both the hardware and software in an upcoming post.

I’m trying as hard as I can to make Flyer as powerful and easy to use as possible, and there’s already some pretty cool stuff I can’t wait to share!

Flyer Prototype PCBs

Shiny new prototype PCBs arrived today from Silver Circuits, and I will assemble the first couple of Flyer prototypes over the next day or two. Results will be posted here, good or bad 🙂

Fire up the Weller…

Flyer (link coming when I have a proper page set up) is a peripheral for Commodore 8-bit computers providing both internet connectivity and drive emulation.

Continue reading

Grand Opening!

Welcome to retroswitch.com!

This site will feature information on various retro-computing projects (mostly Commodore-related) I’m working on in my spare time, including Flyer,  a combination internet modem and drive emulation peripheral compatible with the entire line of Commodore 8-bit computers including the PET. I’ll be posting more detailed information on that one soon.

You can also expect to find general information on interfacing with older computers, repair tips & utilities, source code, and any other “techie stuff” I feel might be useful/interesting to the Commodore community, and which hasn’t already been covered extensively by the many excellent sites and forums out there.

I hope you’ll find something interesting here, and thanks for stopping by!